关键词 > PHOTOGRAPHY
PHOTOGRAPHY Individual Design Project - Exam 50%
发布时间:2025-05-22
Hello, dear friend, you can consult us at any time if you have any questions, add WeChat: daixieit
Individual Design Project - Exam 50%
PHOTOGRAPHY
Your final project is the equivalent of an exam and is worth 50% of your Design course mark.
TASK ONE: A THEME
1. You need to select a photography theme that you will work with for the entire project.
a. Think about what your theme will be out of the following ideas: Day and Night, Opposites, Daily Life.
b. Think about how you can create a series of artworks inspired by those prompts- they are very broad ideas as you create many kinds of artworks.
c. In class, you need to have you theme signed off by your teacher.
2. Create a new Powerpoint presentation (ppt) for your Individual Project
a. Add your student ID number, your name and “individual project” to the first slide
b. Write about your theme idea on the next slide.
c. Write notes about why you have chosen your theme and what has inspired you.
Look at existing photography exhibitions and what they have done successfully
3. Brainstorm photo exhibition names. Add your brainstorm notes to your ppt slides.
4. Create a mood board for your theme of inspiration photos and ideas + planning for your photoshoots.
TASK TWO: CREATE A LOGO
1. Companies, social awareness campaigns and more can have logos. Think about the images, important words (taglines or slogans) and colours (think about colour theory and colour associations) for your exhibition. Add these details to your ppt slides.
2. Sketch some logo ideas, add a photo of these sketches to your ppt.
3. Create 6 computer-generated logo concepts (vector logo designs using Adobe Illustrator) and add these to your ppt.
4. Share your 6 logo concepts in class and receive feedback. Select your best two logos.
5. Develop your best two logos. Keep screenshots/records of your development. Add your two developed logos to your ppt.
6. Ask your teacher for feedback on your two developed logos. Select your best logo to be your final logo. Complete any final adjustments or refinements to your final logo. Add your final logo to your ppt.
TASK THREE: PHOTOSHOOTS
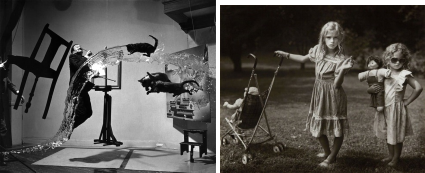
1. Research some existing famous photography exhibitions from around the world that inspire you.
2. You will be given some resources for choosing Artist Models document– you will use their style to guide in creating your photographs. You must select 1 (at minimum)
3. Take 3+ photoshoots (each with 10 or more images) in your location, inspired by your Artist Models.
4. Present these in your ppt as CONTACT SHEETS
5. Select your best 6 photographs from your multiple photoshoots that reflect your theme.
6. Make any edits that you need to using Adobe Photoshop and Lightroom.
7. Construct a digital exhibition in Photoshop of your best 6 images
TASK FOUR: CREATE A WEBSITE HOMEPAGE
1. Follow the class learning on good UX and UI (User Experience and User Interface Design). Write short notes in your ppt on what features your homepage needs to include to ensure it is appropriate for your theme.
2. Design 4 website homepage concepts using Adobe Illustrator or Adobe Photoshop. Procreate can be used to create artworks etc for the website but you should be using Ai or PS for the website concepts themselves, this allows you to create more interesting interactive websites.
3. Share your 4 website concepts in class with your teacher for design feedback.
4. Select your best two website homepage concepts to develop further. Keep records of your developments and add these to your ppt.
5. Share your two developed designs and select your final homepage design.
6. Make any final adjustments to your website homepage design and add the finished design to your ppt.
TASK FIVE: CREATING A BRANDING GUIDELINE OF ALL YOUR WORK
Create a Branding Guideline to explain the following things:
The specific fonts you will be using in your design
The specific colours you will be using throughout your design
The kinds of imagery you will be using in your design
The language your theme will use (casual, professional, appealing to children/young adults)
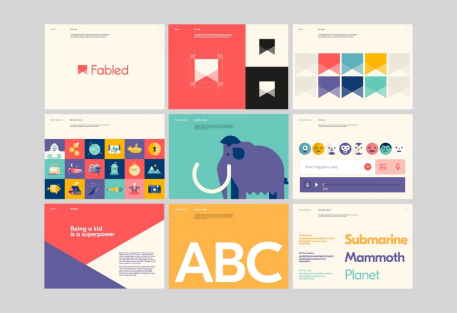
This is an example of a business’s branding guideline
ALL THE IMAGES USED HAVE TO BE MADE BY YOURSELF – You need to add a slide showing us how you have created the images and illustrations for your project.
Your final project will be submitted as a Power point (ppt) and will include:
· Theme introduction
· Theme research
· Branding Guide
· Logo
· Photoshoots and best 6 images
· Website
· Images made for the project
