关键词 > COMPX202(HAM) COMPX242(HAM) andCOMPX202(TGA)
COMPX202 (HAM), COMPX242 (HAM), and COMPX202 (TGA) Assignment One: Android Responsive UI + Java
发布时间:2023-08-09
Hello, dear friend, you can consult us at any time if you have any questions, add WeChat: daixieit
Assignment One: Android Responsive UI + Java
COMPX202 (HAM), COMPX242 (HAM), and COMPX202 (TGA)
Due: Friday 11th of August 11:59pm
Project description
“This year the University of Waikato is celebrating 50 years of computing. The School of Computing and Mathematical Sciences (SCMS) is considering developing an Android application as part of their celebrations. As such, they have asked you to develop a simple but engaging application that can be used to provide staff, students, and the wider community with “fun facts” about computing at Waikato. SCMS has asked that the application be responsive to screen size, so that it looks good on majority of screen sizes. The application should also look good in both portrait and landscape orientations. ”
Introduction
This assignment has four objectives:
1. Successfully create your first Android application;
2. Use Git from within Android Studio;
3. Learn about and develop the layout of a responsive Android application; 4. Interact with the Android UI through Java.
The assignment focuses on the Android UI – specifically using XML to create ViewGroups and Views – and takes advantage of the values and drawables folders. In addition, this assignment aims to familiarize you with the Java side of Android development.
Resources required for completing this assignment to the specifications have been included on Moodle. Pay close attention to the screenshots used throughout these assignment instructions as they will demonstrate how the application should look and function. These screenshots were taken using the Pixel 4 Emulator. However, please note that your application should be responsive and should look good on all screen sizes and orientations.
You are required to use Git Lab for assignment submission. During marking, we will be looking to ensure that there is at least one commit and push per assignment part. Failure to do so will result in a reduction of marks even if the final application otherwise meets the specifications.
Note, if any of these instructions are unclear to you, you are expected to ask for clarification. Start the assignment early and make use of the labs for extra guidance and assistance.
Part A: Setup – creating an Android app and using Git
1. In Git Lab, create a new repository called “AssignmentOne” . (DO NOT include a
readme file. The repository needs to be empty – Android Studio requires an empty repo).
2. Make sure that the visibility of your project is set to Private. (If not: Settings > expand Permissions > Project visibility: Private; Save changes).
3. Create a new Android application in Android Studio. (see the lecture content for creating a new Android application).
4. Run your application to make sure it works. This can either be done using your personal device or using an emulator.
5. Use Git from inside Android Studio to add, commit, and push your new Android
application to Git Lab. (see the lecture content for using Git inside Android Studio).
6. Check that your Android application has successfully been pushed to Git Lab – the “AssignmentOne” repository should now contain your Android application.
Note, when setting up your Android application, you should create it using an Empty Views Activity. It should be named “AssignmentOne” , should use Java, and should use a minimum API level of API 23: Android 6.0 (Marshmallow).
Part B: Android XML
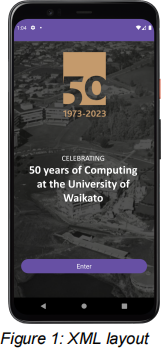
Alter the activity_main.xml file to duplicate the UI layout shown in Figure 1. There are good and bad ways to create this layout. Use what you have learned in the lectures to create a good layout using ViewGroups and Views. Your application must be responsive and must not use any hard coded sizes (with the exception of margins and padding). You can find the required images on Moodle.
Don’t forget to add, commit and push your work to Git Lab.
Part C: Android resources
While Part B focused on using XML to describe the UI layout, this section utilises some of the other resources found in the res folder. Complete the following steps:
1. Change the name of the application to be “CMS” .
2. Use the 50th colours in your theme: gold (#C49A6C), dark gold (#AD7B45), silver (#F2F2F2), and dark silver (#C2C2C2).
3. Create a new launcher icon using the logo image (img_logo_short.png, available on Moodle).
4. Ensure that you have not included (and do not later include) any hard-coded strings. All strings should be defined in the strings.xml file.
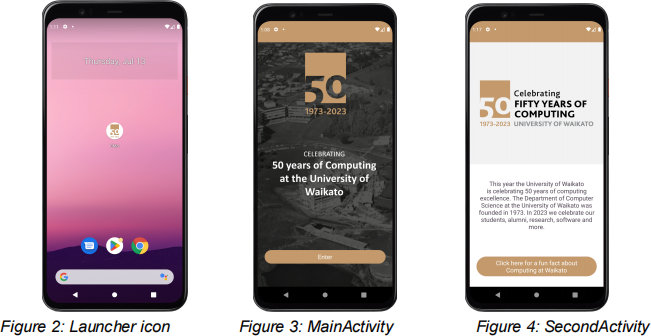
Your application UI should now reflect that shown in Figure 3, while your launcher icon should look like the one shown in Figure 2. Don’t forget to add, commit, and push your changes to Git Lab.
Part D: Creating another Activity
Your next step is to create a new Activity and set up the XML layout for that Activity.
Your new Activity should be called “SecondActivity” and should contain the layout illustrated in Figure 4. Remember, there are good and bad ways to create this layout. Use what you have learned in the lectures to create a good layout using ViewGroups and Views. Your application must be responsive and must not use any hard coded sizes (excluding margins and padding). You can find the required images on Moodle. Don’t forget to add, commit and push your work to Git Lab.
Part E: Onclick Events & Intents
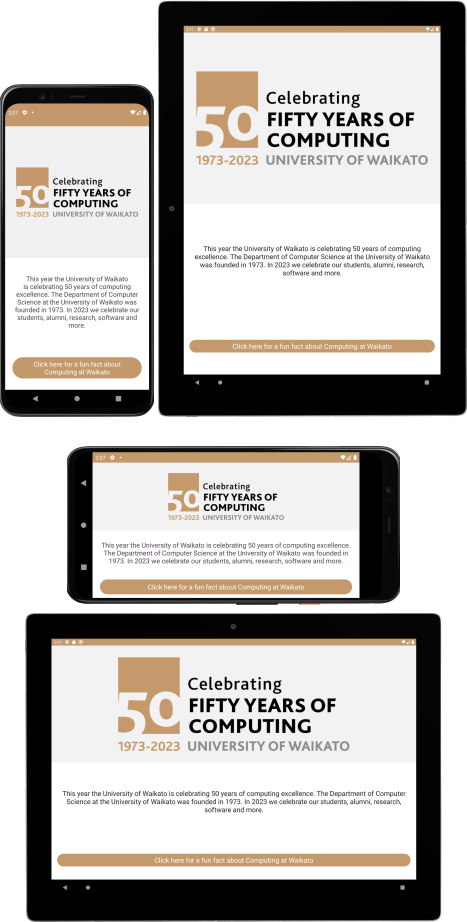
Your next task is to add an “onclick” event to the “ Enter” Button in the MainActivity. This onclick event should then use an Intent to open the SecondActivity. Don’t forget to add, commit, and push your changes to Git Lab.
Part F: Random number generator + Java Functionality
The SecondActivity includes a button that says “Click here for a fun fact about Computing at Waikato ”. Your next task is to set up the Java functionality so that when the button is clicked the following occurs: (1) a random number between 0 and 7 is generated, (2) the random number is added to an Intent, and (3) the FunFactActivity (see below) is started, using that Intent.
Part G: Advanced UI and Java Functionality
Your penultimate task is to create one more Activity and develop dynamic Java functionality.
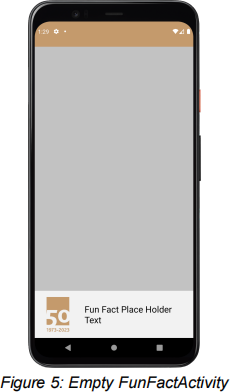
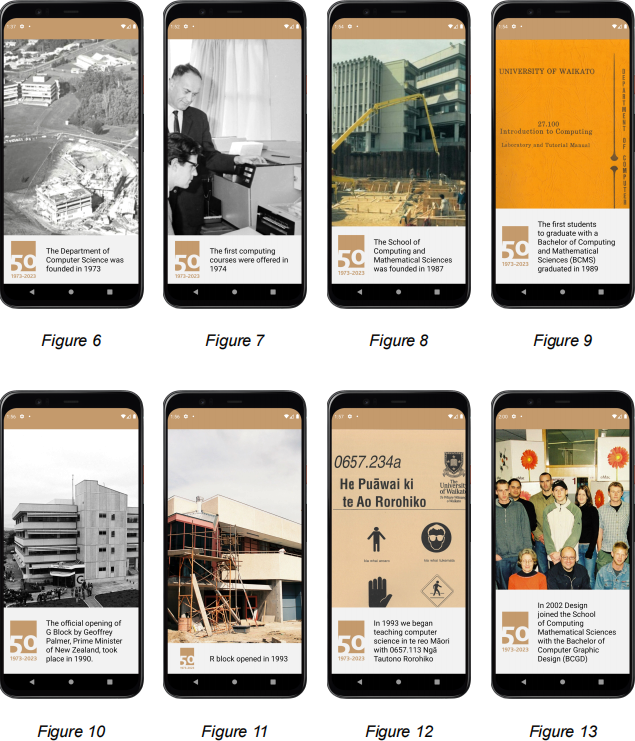
Your new Activity should be called “ FunFactActivity” and should contain the layout illustrated in Figure 5. Remember, there are good and bad ways to create this layout. Use what you have learned in the lectures to create a good layout using ViewGroups and Views. Your application must be responsive and must not use any hard coded sizes (with the exception of margins and padding). You can find the required images on Moodle.
You are required to add code that populates the Activity with data stored in arrays.xml. (Note, you will need to copy the arrays.xml file into the “values” folder).
The arrays.xml file contains two arrays, one that contains a series of “fun facts” about Computing at Waikato and one that contains the names of corresponding images. You will need to retrieve the text and image name that corresponds to the number that was passed through from the SecondActivity.
Once you have retrieved the content from arrays.xml, you can use it to populate the FunFactActivity. Figures 6 to 13 show what the FunFactActivity should look like once it has been populated with data for each of the fun facts.
Don’t forget to add, commit and push your work to Git Lab.
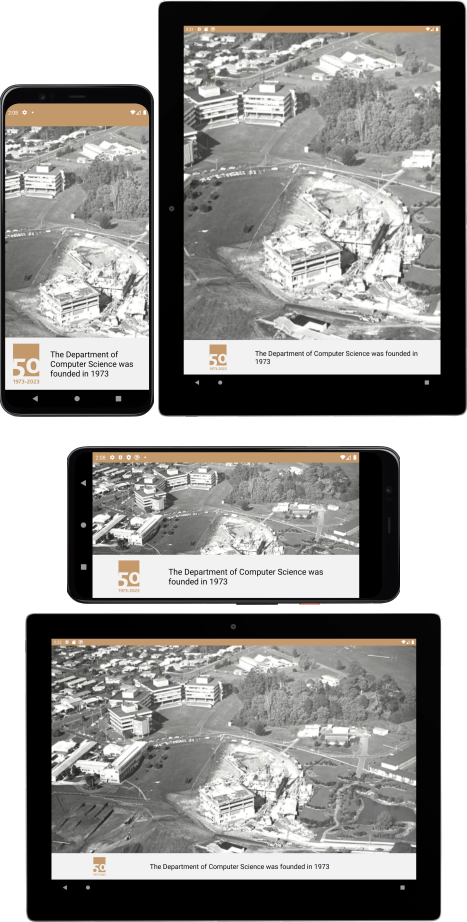
Your current layout works well when in portrait orientation, but may not be as well suited for landscape, or different screen sizes. Run your application on a variety of screen sizes and orientations to ensure that your layout truly is responsive. Appendix 1 (on the last page) shows some examples.
Don’t forget to add, commit, and push your changes to Git Lab.
Part I: Code quality
Make sure you structure and comment your code appropriately and avoid code smells!
Submitting
Make sure you have pushed all of your changes to your Git Lab repository. Ensure that you can see your changes on Git Lab. It is usually a good idea to clone the repository back to a new location on your local machine and re-run it to check that it was uploaded correctly.
|
Grading |
|
|
Weighting |
Allocated to |
|
15% |
Part A – Creating your app and using Git |
|
15% |
Part B – Android XML |
|
5% |
Part C – Android resources |
|
15% |
Part D – Creating another Activity |
|
5% |
Part E – Onclick events & Intents |
|
5% |
Part F – Random number generator and Java |
|
20% |
Part G – Advanced UI and Java Functionality |
|
10% |
Part H – Orientation and Screen Size |
|
10% |
Part I – Code quality |
Appendix 1: Orientation and Screen Size examples (Pixel 4 & Pixel C)
MainActivity, phone versus tablet, portrait versus landscape:
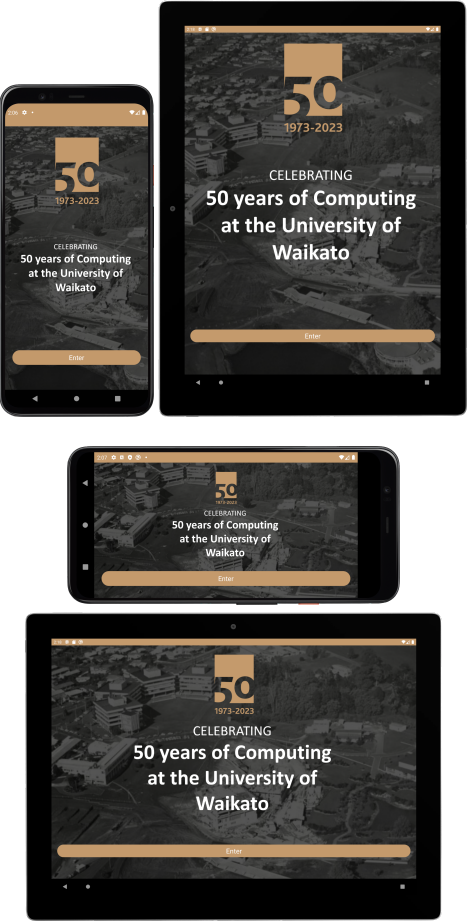
SecondActivity, phone versus tablet, portrait versus landscape:
FunFactActivity, phone versus tablet, portrait versus landscape: