CSCI165 Photo Gallery
Hello, dear friend, you can consult us at any time if you have any questions, add WeChat: daixieit
CSCI165
Photo Gallery
Anything in green, is optional.
(1) Create a folder on Onedrive/Desktop: name the folder: GalleryWebsite
(2) Download all files and save into the folder
(3) Open index.html in Notepad++. Rename to firstname_index.html
(4) In the footer, add a horizontal line using the tag,above the paragraph. Change the year to the current year, and “Student Name” to your name
Inline Styles
(5) Add 1em padding to the h1 tag e.g. padding: 1em. Save and run the file to
preview (keep the previewed page open, so for future previews you can simply refresh the page)
You can experiment with setting padding for the top/bottom/left/right of the element
(6) Add a 3 pixel dashed green border to the h2 tag e.g. border: 3px dashed green
Again, you can experiment with setting borders for the top/bottom/left/right of the element
(7) Choose one of the images from the downloaded imagefiles and in the main
division of the page - add a link to that image (put into a new paragraph).
Set the alt attribute to a suitable description
Set the height and width attributes to 75%
(8) Create an embedded stylesheet. Inside, set up an ID called #figure and add the following rules:

Add the id “figure” to the opening main tag
(9) Add a paragraph underneath the image which contains a few sentences with
additional information about the image chosen (use your imagination or google!)
Preview the content and use the
as needed.
(10) In the Embedded Stylesheet, add a radial gradient as the background image to the page:
bodybackground-image :radial-gradientGreen,white)
Note: Make sure there is no space between “gradient” and the opening bracket
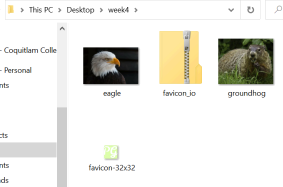
(11) OPTIONAL BUT RECOMMENDED Visit: https://favicon.io/favicon-generator/
Create a favicon and download the zipped folder
Open the zipped folder and copy the favicon-32x32.png file
Paste the copied file into the week4 folder:
(12) OPTIONAL In the head section, add a link to the favicon image:
(If you copy the code above from the favicon webpage - make sure that you remove the forward slash inside the href to the image)
Save and check that the favicon is now visible in the browser tab
PART 2: Creating the Gallery Page
To create the gallery page, you will be saving the existing index page with a new name and then modifying the content in the main section. This means that you save time as you are not having to create a new page from the beginning. Your original index page will not be changed.
(13) In your index page, go to File and then Save as
Save as: firstname_gallery (spelling and case are important)
Delete the content INSIDE the main tags
(14) Add a link from the image on the index page to the gallery page:

(15) In the main section of the gallery page, add the three remaining images (not the image used on the index page)
Give each image suitable alt text
Set image height to: 200px and width to: 250px
(16) Add a link from each of the images to their full sized version. You will also need to use the target attribute to open up the full size image in a new browser window, see below:

(17) Under the last image, add a paragraph: Click on an image to open the full-sized picture.
Set the paragraph to bold using an inline style and the font-weight property
(18) Upload both webpages to MyCC
2024-02-03