Capstone Project 2: Machine Learning for a Self-Driving Car System
Hello, dear friend, you can consult us at any time if you have any questions, add WeChat: daixieit
Capstone Project 2: Machine Learning for a Self-Driving Car System
Introduction:
In this Capstone Project 2, you, as a data scientist, will take on a critical role in designing and
testing the capabilities of cutting-edge software for a self-driving car. The primary objective is to develop a robust system that can reliably detect instances of harsh driving caused by the driver. This capability is crucial for enhancing the safety and efficiency of autonomous vehicles.
Dataset Overview:
The dataset at your disposal contains a wealth of information crucial for training and validating the proposed software. The information was collected using IoT systems based on targeting relevant sensor data to driving conditions. Each record is characterized by a timestamp, road type, and a series of sensor readings, including accelerations (acc_x, acc_y, acc_z), gyroscopic measurements (gyro_x, gyro_y, gyro_z), magnetic compass readings (mag_x, mag_y, mag_z), and an event classification indicator (event_class). See today s(’) slides for more details on these sensors.
Project Overview:
Your task is to leverage this dataset to build a model capable of accurately detecting instances of harsh driving. Harsh driving events pose potential safety risks, and early identification is critical for implementing timely corrective measures. For example, when the car abruptly swerves from its lane, the harsh driving flag could trigger other sensors, such as proximity sensors, to assess whether corrective actions are necessary. Similarly, in scenarios involving sudden acceleration or braking, the harsh driving flag could prompt the car's cameras to record potential accidents for further analysis.
Solution Submission:
To submit your project, follow these steps:
A. Save your Jupyter Notebook as a PDF: Use your browser's print functionality to save/print the screen as a PDF file.
B. Naming Convention: Save the PDF file as "Name1_Name2_Capstone2.pdf".
C. Submission: Upload the saved PDF file to the "Capstone Project 2" section on Canvas.
D. Note: Please include comments for each step of your code.
Part 1: Data Exploration and Cleaning
A. Begin by loading the car sensor readings dataset into your Jupyter Notebook using the Pandas library.
B. Perform exploratory data analysis by calculating and printing out the following descriptive statistics for all sensor readings. (Hint: Refer to Lab 15)
a. Total number of records
b. Shape of the dataframe
c. Mean
d. Standard deviation
e. Minimum and maximum values
f. Quantiles (e.g., 25th, 50th, and 75th percentiles)
C. Utilize Matplotlib or Seaborn to create various plots that provide additional insights into the data.
a. Identify patterns or correlations between different sensor measurements by creating pair plots to visualize relationships between pairs of sensor readings.
b. Analyze range and frequency of observations for each variable in the dataset by creating histograms for each sensor reading to visualize the distribution of values.
D. Now that you have performed exploratory data analysis by calculating various statistics and creating many plots to visualize the characteristics of the sensor data, provide a detailed analysis of what you found in 1B and 1C. Describe any interesting patterns, trends, or anomalies you observed in the dataset that may give insight to the harsh driving flag prediction in the self-driving car dataset.
E. Preprocess your dataset
a. Clean up your dataset by removing any unnecessary columns that may not contribute significantly to the analysis.
Part 2: Model Training
A. Begin by splitting the dataset into training and testing sets. This step is crucial for assessing the model's performance on unseen data.
B. After the split, print the total number of rows and columns (dataframe shape) in both the resulting training and testing datasets. Understanding the dimensions of these sets is essential for effective model training and evaluation.
C. Train the following machine learning models using the training set to predict whether a harsh driving instance was detected by the sensors or not:
a. kNN (k-Nearest Neighbors)
b. Decision Trees
c. Logistic Regression
Part 3: Model Evaluation
A. Predict whether a harsh driving instance was detected by the sensors or not using the test set to validate whether the self-driving car’s software effectively identifies harsh driving conditions.
B. Using the test set, conduct a comprehensive evaluation of the models'performance using the following key metrics: accuracy and confusion matrices. These metrics provide insights into both overall model performance and specific classification outcomes.
C. Compare the performance of the three models. Which one did a better job at detecting
harsh driving instances? Does a higher accuracy signal better detection of harsh driving instances (Hint: analyze the results of the confusion matrix)? Are there any differences in performance that stand out to you? Explain your reasoning.
Part 4: Hyperparameter Tuning
Hyperparameter tuning is a crucial step in optimizing machine learning models. It involves fine-tuning the configuration settings, known as hyperparameters, to enhance a model's performance. By exploring different combinations, we aim to find the most effective hyperparameter values that lead to improved accuracy and generalization.
In this section, your goal is to optimize the detection of harsh driving instances in your self-driving car by using hyperparameter tuning.
A. Using the kNN classifier and the same train/test data splits from above, train your classifier using the following number of neighbors: 1, 3, 5, 10, 25, 50, 100.
a. Plot your accuracy results at each of the values for number of neighbors b. Add relevant labels to your plot
c. Identify which number of neighbors led to the best performance
B. Using the Decision Trees classifier and the same train/test data splits from above, train your classifier using the following values of max_depth: 1, 2, 3, ‘None’
a. Plot your results at each of the values for max_depth
b. Add relevant labels to your plot
c. Identify which max_depth led to the best performance
C. Using the Logistic regression classifier and the same train/test data splits from above, train your classifier using the following values of max_iter: 1, 10, 100, 1000, 10000
a. Plot your results at each of the values for max_iter
b. Add relevant labels to your plot
c. Identify which max_iter led to the best performance
D. Ensure that the results from A,B, and C are displayed as three subplots of the same figure.
Part 5: Interpreting the models
In this section, we delve into the interpretability of classifiers to understand the significance of each feature in the prediction process. We will gain insight into how the model detected harsh driving instances. More specifically, we will look at which variables in the dataset were useful for the Logistic Regression and Decision Tree classifiers to distinguish between harsh driving (1) and not harsh driving (0).
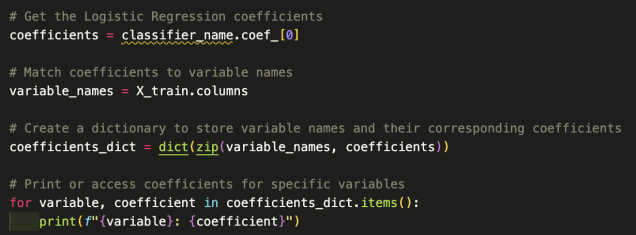
A. Using the Logistic Regression classifier, print the feature coefficients to understand how the classifier made its predictions.
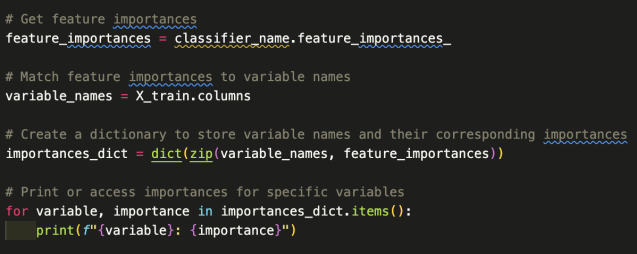
B. Using the Decision Tree classifier, print the feature importances to understand how the classifier made its predictions.
C. Create bar charts for the coefficients ofpart A and the feature importances ofpart B.
Hint: plt.bar((replace with names of columns in X), (replace with coef/importance values))
D. Describe what you see in the results from part A, B & C and how that relates to the
detection of harsh driving instances. How do these compare to each other? How do they compare to your data analysis and exploration in Part 1?
Part 6: Functions for Analysis, Preprocessing and Model Training Steps
A. Create a function that prints out all statistics and plots from Part 1
a. Input: DataFrame containing the imported dataset.
b. Output: None (no return value).
B. Create a function that handles the data preprocessing and splitting steps
a. Input: DataFrame containing the imported dataset.
b. Output: Fully preprocessed and split datasets (X_train, y_train, X_test, y_test).
C. Create a function that trains and tests the machine learning models
a. Inputs: Preprocessed datasets (X_train, y_train, X_test, y_test); classifier selection flag (1 for Logistic Regression, 2 forkNN, 3 for Decision Trees).
b. Output: None.
c. Functionality:
i. If an invalid value is provided for the classifier selection flag, a classifier is randomly chosen.
ii. Prints the name of the classifier being used.
iii. Uses the best hyperparameter values found in Part 4.
iv. Trains the classifier using the training data and measures performance using the test data.
v. Calculates and prints the model's accuracy and confusion matrix.
D. Call the functions
a. Call the Data Exploration Function once to analyze and generate initial insights from the dataset.
b. Call the Data Preprocessing Function to preprocess the dataset and create the data splits.
c. Call the Model Training Function four times, each for a different scenario, and print the results.
i. Scenario 1: Logistic Regression
ii. Scenario 2: kNN
iii. Scenario 3: Decision Trees
iv. Scenario 4: Randomly selected classifier (in case of an invalid flag).
2023-12-09